AMD mainframe are amongthe best processorsaround and fit all sort of budgets , but they are a little different to their Intel twin .
For starter , the personal identification number are on the chip itself , rather than in the socket . You ’ll also demand a dissimilar bracket to deploy the cooler more often than not . But even with those pocket-sized hiccups in our way , there ’s no reason you ca n’t learn how to install an AMD processor in a few minutes .
If you ’ve not buy your AMD chip yet , here ’s a guide tothe best AMD processorsavailable , no matter what you want to do with them .
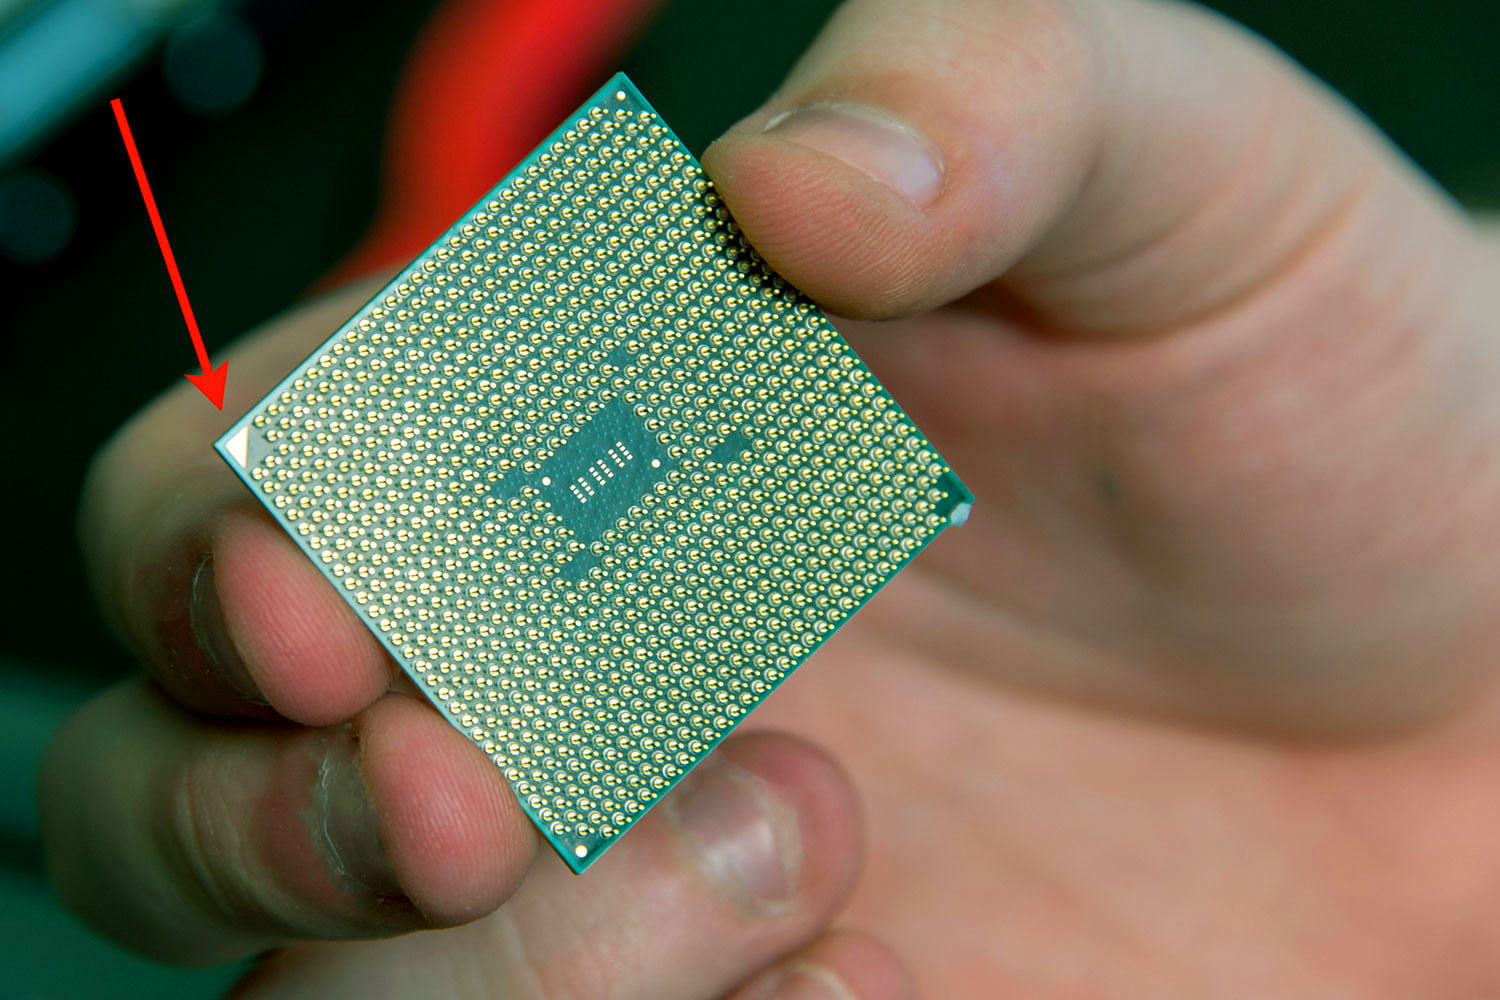
Image used with permission by copyright holder
Step 1: Prepare your parts
You do n’t want to have to stop half - style through the initiation procedure to find something that you need to dispatch the installation , so check that you have everything within easy reaching before getting started . You ’ll require the AMD CPU itself , a motherboard to punch it into , and a tank . If the cooler comes with heatpaste pre - applied , like the stock AMD Ryzen chiller , then you do n’t call for anything else . If it does n’t , you ’ll also postulate some heatpaste of your own .
It ’s also a honest approximation to have a lint - free cloth and some 100 % isopopyl alcohol to turn over , in case you get a bit overzealous with the heatpaste . We ’s also recommend an anti - motionless traveling bag for localize electronic components on , and check that that you have good lighting so that you’re able to see what you ’re doing .
Depending on your cooler , you may need a screwdriver as well . Typically , a Phillips head with a comparatively farsighted torso , but check your tank to be trusted .
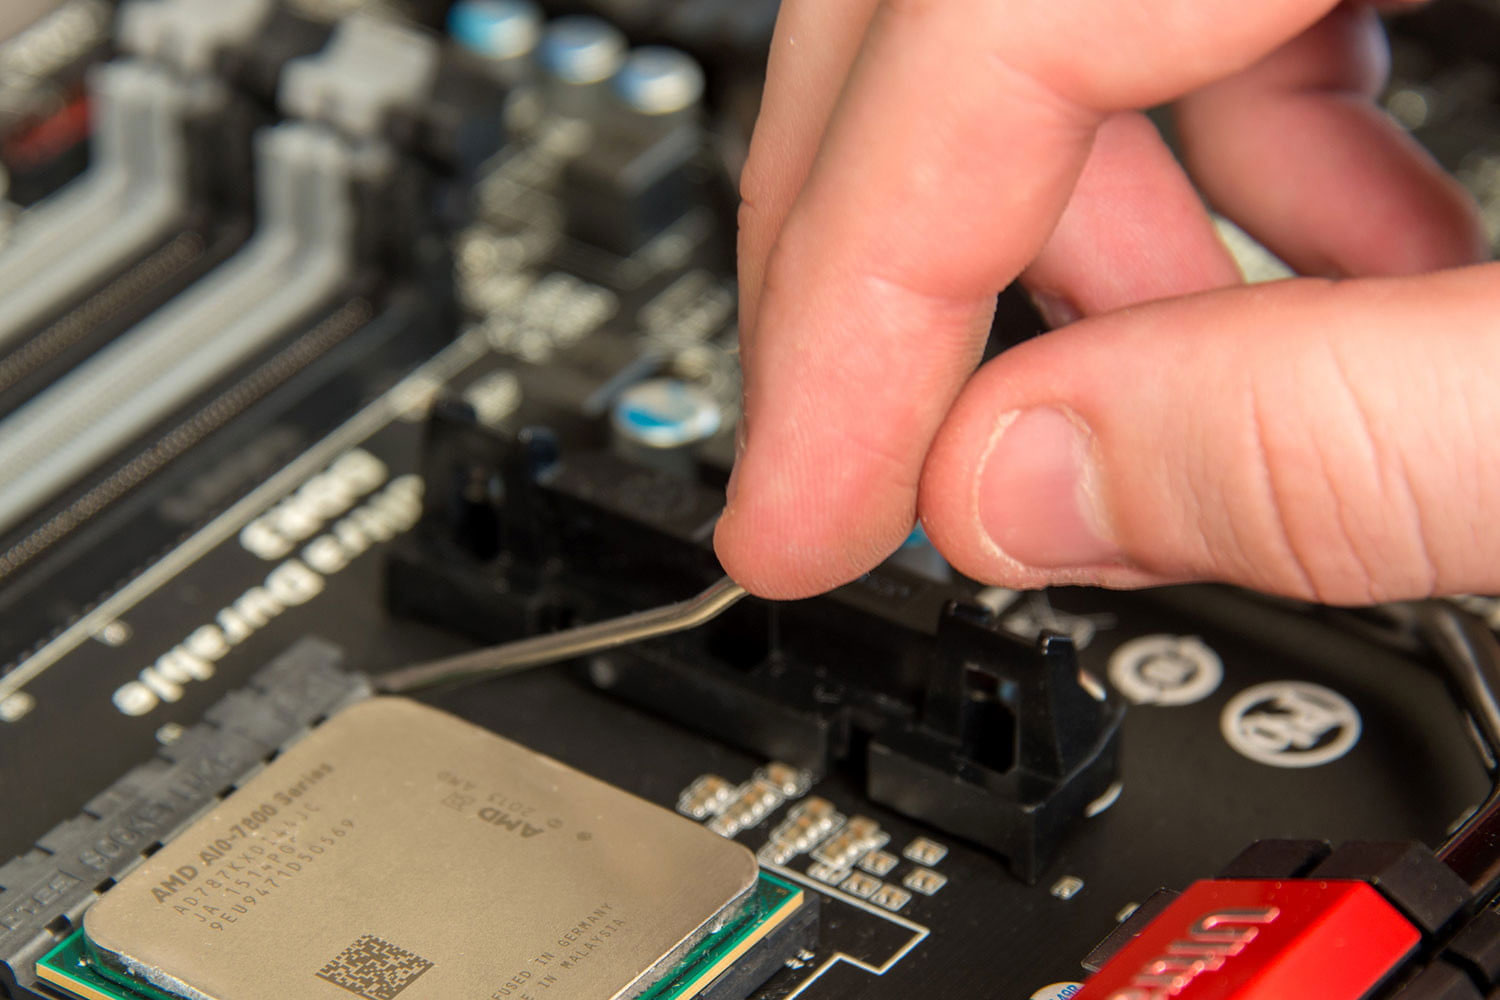
Image used with permission by copyright holder
Note : We would also recommend you utilize an anti - static wristband to make certain you do n’t channelize any stable charge to your components . At the very least , however , verify that you ’re instal your AMD CPU on a non - conductive surface , and ground yourself before jump by touching something metal , like your PC ’s case or PSU chassis .
Before proceeding , ensure the work orbit is clean and fuddle free . This will help to ensure no dirt and detritus draw its agency into your motherboard and the CPU socket .
Step 2: Identify the CPU socket
It ’s important to make certain you live where the CPU socket is situated on your motherboard before you unpack the new CPU .
One way to do this is to check the motherboard manual . However , if you know what you are looking for , a visual check should do . The CPU socket is a rectangular portion of the motherboard , with a alloy lever along one side . This is a retentiveness arm that lock up into place when advertise under a catch . When release , the arm can be lifted to unloosen the securing bracket — the CPU will sit underneath this/
When you ’re quick , lift the retention arm into the vertical position . If you ’re work on a brand new motherboard , remove the protective credit card insert from the socket . If you ’re replacing a CPU , you ’ll need to remove the older CPU and potentially its cooler too . For that , see the instructions for your specific cooler . When removing the old CPU , be careful when handling it if you contrive to reuse it .
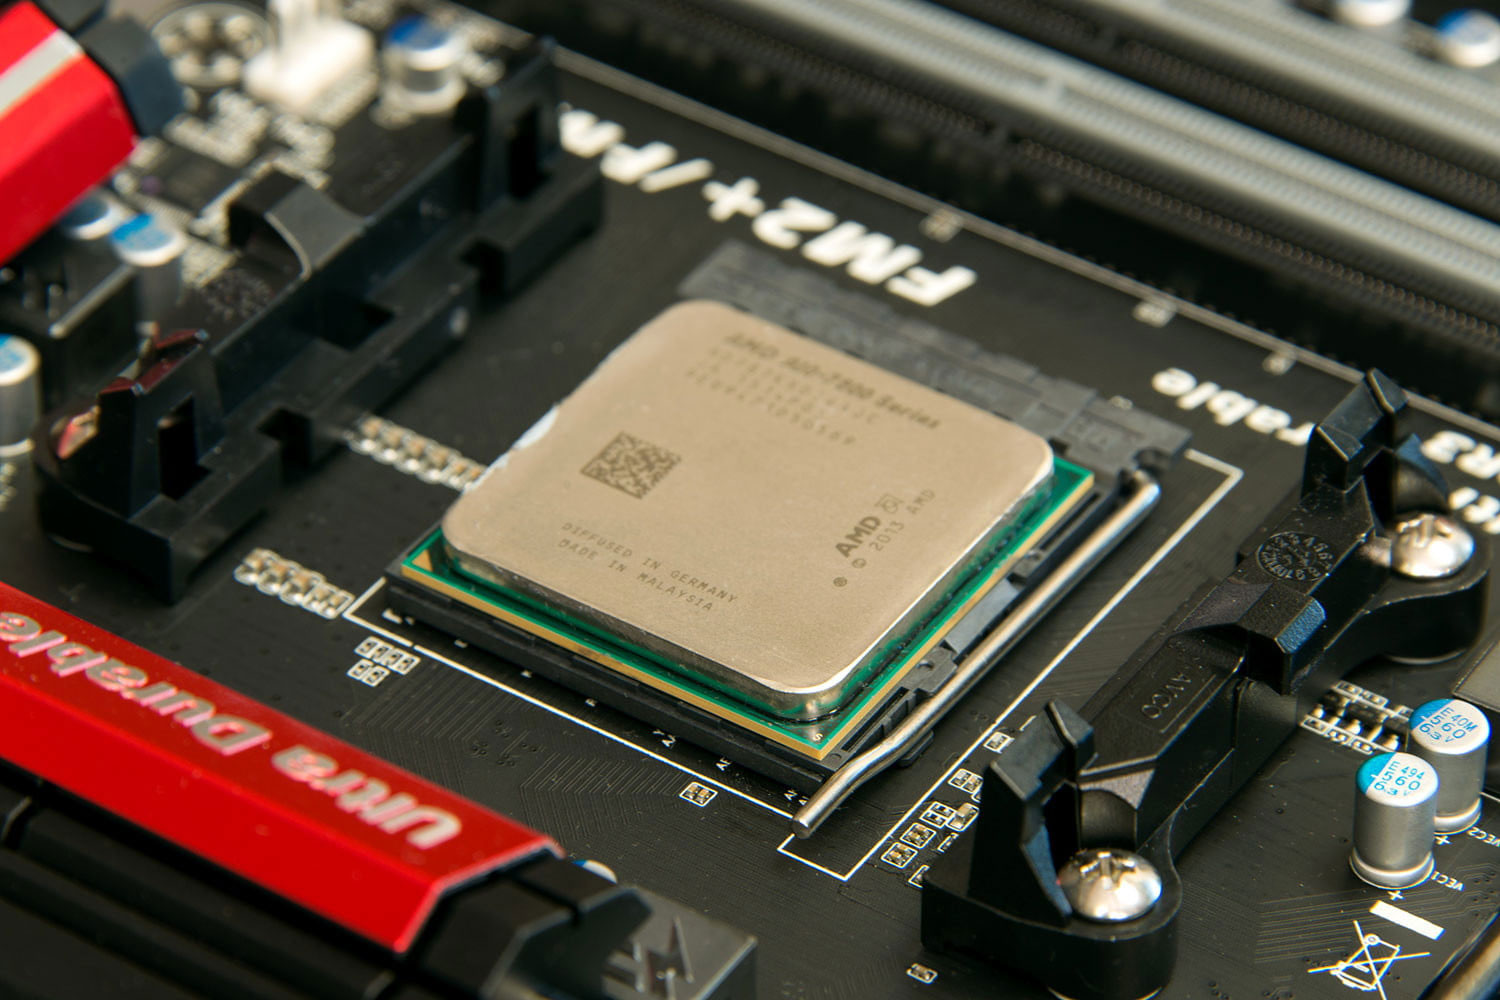
Image used with permission by copyright holder
Step 3: Install the CPU
Note : While elder AMD processor have the peg on the micro chip itself ( Pin Grid Array , or PGA ) , AMD has recently followed Intel in adopting recent example use the Land Grid Array ( LGA ) . Bending or breaking fall on an former CPU give it processor unuseable . Similarly , bending pins on an LGA port will get out the entire motherboard useless . Whichever CPU type you ’re using take exceptional concern , and only wield the gimmick at its turning point .
Remove your new CPU from its packaging if you have n’t already , and front at its underside . In one of the corner you should see a small , golden triangle . This tally to an indented triangle on your motherboard ’s CPU socket and will help you orient the chip the right way . cautiously place it into the socket , making certain that all of the pins slip home into their check ports . It should n’t take any force , so if it does n’t fit quite decently , bump off it , and start again .
Once the CPU is in position , and you ’re certain that it ’s instal correctly , press the retention limb back into place on the socket . This will take a small amount of violence , but it should n’t be exuberant . swear your instincts and if you ’re unsure , double check everything is ripe before press any harder .
Step 4: Install the cooler
No AMD central processor will solve for long without a cooler . You ’ll get one in the box with most AMD CPUs , or you may apply an aftermarket option , whether that ’s strain or liquid . In any case though , the installation will be very specific to your chosen cooler , so name to the manual of arms for any footmark you may need to take . You are quite probable to need access to the behind of your motherboard , so verify that ’s potential by removing the back panel from your microcomputer chassis .
Whatever cool you install though , it needs something to transfer warmth from the CPU to the cooler efficaciously . That ’s where the thermal spread or heatpad comes in . A number of CPU coolers will have the spread pre - applied in the manufacturing plant , so if yours has that , you could only watch over the cool installment instructions . If yours does n’t have paste pre - applied , however , you ’ll postulate to do it yourself .
There are a number of ways you’re able to apply heat spread , from spread it across the whole airfoil , to cross techniques , and there are argument for more or less . The simplest and most beginner well-disposed of them all , though , is to squeeze a pea - sized amount justly in the middle of the chip . If you end up with too much , hit the chip and use the lint - gratis material and isopropyl alcohol to carefully clean it off . Then start the cognitive process again .
Some heatpaste is electronically conductive . While most is n’t , it ’s a good rule of thumb to obviate getting any of it on the undersurface of the CPU , or in any of the interface in the socket . Be deliberate and precise with your placement .
If you ’re using a heatpad , simply order it over the CPU , stool sure that it ’s the correct size and that it ’s match snuggly .
Then take the tank ’s devotee header and plug it into the respective slot on your motherboard . It will be a three or four stick fan header , usually with a assignment on the board that read CPU Fan , or exchangeable . If in doubt , refer to your motherboard ’s manual of arms .
Step 5: Test the CPU
If the steps above all break well , your CPU should now be successfully establish . If you are in the cognitive operation ofbuilding a PCmake certain you have everything in place before proceeding . That ’s when you’re able to start up your system up and see if it carry and better yet , boots to your operate organisation of choice . If it does , congratulations , chance are all is well . Now you could considertrying to overclock your CPU .
Before you do anything else , though , we ’d urge using a temperature detection lotion like AMD ’s ownRyzen MasterorHWInfo to make surethe CPU is cooled well enough . If it is n’t , you may find that your ice chest is n’t mounted the right way , or the screws are n’t tight enough .
If your system does n’t kick , refer to your motherboard manual to decode any symptomatic beeps or light , then try remount the CPU and cooler .
